
When it comes to enhancing your outdoor living area, few things can match the transformational power of laying pavers. Whether you’re looking to create a welcoming patio, a charming garden path, or a sturdy driveway, pavers offer versatility, durability, and aesthetic appeal. In this comprehensive guide, we’ll delve into everything you need to know about pavers to revamp your outdoor space and elevate its functionality and beauty.
Understanding the Basics of Pavers
Before diving into the intricacies of laying pavers, it’s essential to understand what they are and how they differ from other outdoor surfacing materials. Pavers are individual units made from various materials, including concrete, clay, natural stone, and brick. Unlike poured concrete or asphalt, pavers come in distinct shapes, sizes, colours, and textures, allowing for endless design possibilities.
Planning Your Paver Project
A successful paver installation begins with careful planning. Start by assessing your outdoor space and determining the purpose of the paver area. Are you creating a patio for entertaining guests, a pathway for navigating your garden, or a driveway for parking vehicles? Once you’ve established your goals, consider factors such as size, shape, layout, and material selection. Take precise measurements and sketch out your design to ensure a seamless execution.
Selecting the Right Pavers
Choosing the right pavers is crucial for achieving both aesthetic appeal and long-term durability. Consider the architectural style of your home, the existing landscaping elements, and your personal preferences when selecting paver materials, colours, and textures. Concrete pavers offer versatility and affordability, while natural stone pavers exude timeless elegance. Clay and brick pavers provide a classic look that complements traditional and rustic settings.
Preparing the Site
Proper preparation of the site is essential for a successful paver installation. Start by marking the boundaries of the area with stakes and string, then excavate the site to the desired depth, taking into account the thickness of the pavers and the base materials. Remove any vegetation, roots, debris, or existing paving materials to create a clean and level surface. Compact the soil thoroughly to prevent settling and ensure stability.
Creating a Solid Base
The foundation of your paver project is the base layer, which provides stability, drainage, and support for the pavers. Begin by adding a layer of gravel or crushed stone to the excavated area, spreading it evenly and compacting it with a plate compactor or hand tamper. Next, add a layer of coarse sand on top of the gravel base, levelling it meticulously to achieve a uniform surface. Proper compaction of the base layers is essential for preventing shifting, settling, and unevenness.
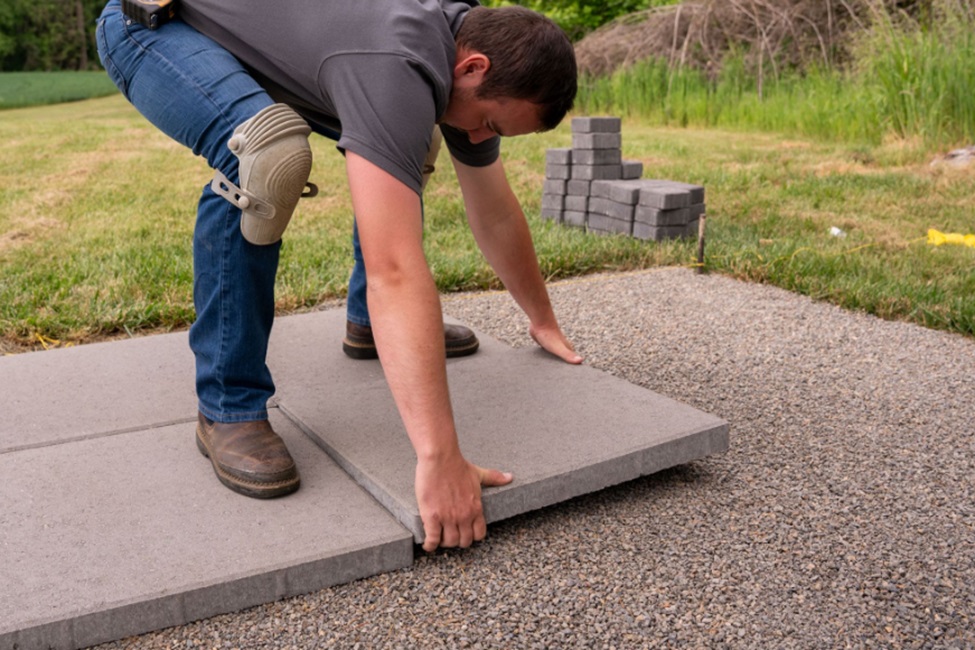
Installing the Pavers
With the site prepared and the base in place, it’s time to start laying the pavers. Begin at one corner or edge of the area and work methodically across the site, placing each paver snugly against the adjacent ones. Use a rubber mallet to tap the pavers into position and ensure they are level and aligned according to your design. Maintain consistent joint spacing between the pavers using spacers or by eye, depending on the desired aesthetic.
Cutting and Shaping Pavers
Inevitably, you’ll encounter areas where standard-sized pavers won’t fit perfectly. In such cases, you’ll need to cut or shape the pavers to achieve a custom fit. This may involve using a saw equipped with a diamond blade for precise cuts or a chisel and hammer for more intricate adjustments. Take accurate measurements and exercise caution when cutting pavers to minimise waste and ensure clean, accurate cuts.
Adding Edge Restraints
To prevent the pavers from shifting or spreading over time, it’s essential to install edge restraints along the perimeter of the paved area. Edge restraints, such as plastic or metal edging, concrete curbing, or natural stone borders, help maintain the integrity of the paver installation and create a clean, finished look. Secure the edge restraints firmly in place, ensuring they are level with the surface of the pavers.
Filling the Joints
Once all the pavers are in place and the edge restraints are installed, it’s time to fill the joints between the pavers with jointing sand or polymeric sand. Pour the sand evenly over the surface, then use a broom or brush to sweep it into the gaps between the pavers, ensuring thorough coverage. Compact the sand into the joints using a plate compactor or hand tamper, adding more sand as needed until the joints are filled to the desired level.
Finishing Touches and Maintenance
With the pavers installed and the joints filled, take a moment to step back and admire your handiwork. Consider adding decorative elements such as outdoor furniture, planters, or lighting to enhance the beauty and functionality of your newly paved space. To maintain the integrity and longevity of your paver installation, perform regular maintenance tasks such as sweeping, weeding, and resealing as needed.
Seeking Professional Guidance
While pavers is a rewarding DIY project for many homeowners, it may not be suitable for everyone. If you’re unsure about your abilities or the scope of your project, don’t hesitate to seek professional guidance. A reputable landscape contractor or paver installation specialist can provide invaluable expertise, from site preparation and material selection to proper installation techniques and ongoing maintenance. By enlisting the help of experienced professionals, you can ensure that your paver project is completed efficiently, effectively, and to the highest standards of quality. Whether you choose to tackle the project yourself or enlist professional assistance, pavers offers endless opportunities to transform your outdoor space and create lasting memories for years to come.
Conclusion
Laying pavers is a rewarding home improvement project that can transform your outdoor space into a functional and visually stunning oasis. By understanding the basics of pavers, carefully planning your project, selecting the right materials, and following proper installation techniques, you can create a durable and beautiful surface that enhances your home’s curb appeal and provides years of enjoyment for you and your family. So roll up your sleeves, unleash your creativity, and embark on the journey of pavers to elevate your outdoor living experience.